I have told in previous post that I have always loved to create and make things. As an elementary student I would sit and stare at the same simple worksheet for what seemed like hours convinced that I could not do it, but when a school project came about I thrived. I loved participating in art, science and history projects. Pretty much anything hands on was what I loved to do.
When I was 9 or 10 years old I discovered a book of children’s sewing projects in our school library. I had great grandmothers who could sew very well, and my mom would mend things from time to time but I had never sewn anything. Immediately after flipping through the pages of the book, I found a project that I knew could do. It was a stuffed animal in the shape of a cat, and it had buttons for its eyes and nose. After checking out the library book I brought it home and talked my mom into letting my younger sister and I make one. We gathered our supplies and took off. In no time at all we had each made a bean filled cat. I was so proud, I took the cat to school at showed it off to the librarian and my teacher.
That little project brought me such joy and accomplishment, I made something all on my own. I still love that feeling. Hopefully in the near future my girls and I can recreate that little cat and they will love it too!
Since I am on the topic of my first sewing project I thought it would be a nice time to share a simple hand sewing tutorial with you all. I am quite certain most of you have seen these Yoyo’s around on home goods as they are quite popular right now. This could be a great first sewing project for a little girl or boy. If you have been sewing forever this might be a new addition to all of your sewing knowledge.
What will you need?
Fabric
A cereal bowl to trace.
Scissors
Thread
Sewing needle
First layout your fabric and put the cereal bowl open side down, so that you can trace around the edge of it. (You can make Yoyos as big or small as you like.)
You should now have a circle traced on your fabric. You can continue by cutting it out.
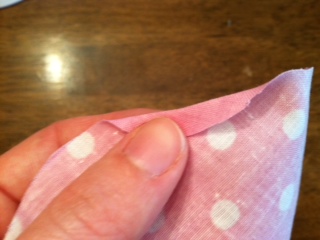
Once the circle of fabric is cut out, thread your needle and fold down the very edge of your fabric
circle. Like seen in the picture below.
Start to stitch in and out all of the way around the circle. As you go it will gather.
When you get to the end pull your thread tight and tie it off. Your finished Yoyo should be just like this.
Now you might be asking yourself, “What do I do with it?”. The possibilities are endless. My Great Grandma Opal used to make many of these and put them together for table toppers. She even made an entire bedspread out of them. It was beautiful! I make and use them for embellishments on dresses and clothing I make for my girls. When I finished their Easter dresses they were cute but need a little something more. After making some yoyos, I put a button in the center and added it to the dresses as a flower. It looked perfect! Like I said the possibilities are endless. If you have a child or grandchild that loves to make and create things. This could be the perfect little project for you and them!
Hope you have a great day!
God Bless
Melissa


Melissa, I love reading your posts. . .and seeing pictures of those adorable little girls!
ReplyDeleteHi there, I am re-posting my comment as it would not accept the first. I found your tutorial on Yoyos just delightful. We have no girls, however I do have a great-grandson....perhaps the yoyo could become a truck tire or two rolling down a hill on a T-shirt...as you stated, the possibilities are endless. Thank you so much for sharing.
ReplyDelete