Monday, October 28, 2013

The Country Vet - Emily Smith

 
I've invited my cousin Dr. Emily Smith back to the blog once again.  I really enjoy hearing her stories and I know a lot of you also do, I hope she continues to visit us from time to time.  I know she's a very busy lady with her veterinary business in Albion IL and I thank you Emily for taking the time to share with us.


Thank you to Chicken Scratch Poultry for letting me be a guest on their blog. I am Angie's cousin and I am a veterinarian in southern Illinois. One of the nice things about being a veterinarian in a rural area is that when you wake up in the morning, you never know what you will do that day. I worked in a predominately large animal practice for the first 10 years of my career and now I own a predominately small animal practice. We still do a few cows, sheep, goats and pigs but small animals and horses make up the bulk of what I see now. Twenty years ago, almost every house in the country around here had some livestock. It seems as the “old timers” have quit farming, a lot of pastures have been turned into fields for crops. It is understandable, but sad to see those little farms go by the wayside.

Some of my favorite clients to visit were an older couple (I will call them Elmer and Thelma) who had a little bit of everything. They had a few cattle, a handful of pigs, one old horse, and a pair of sheep. All of these animals had names 
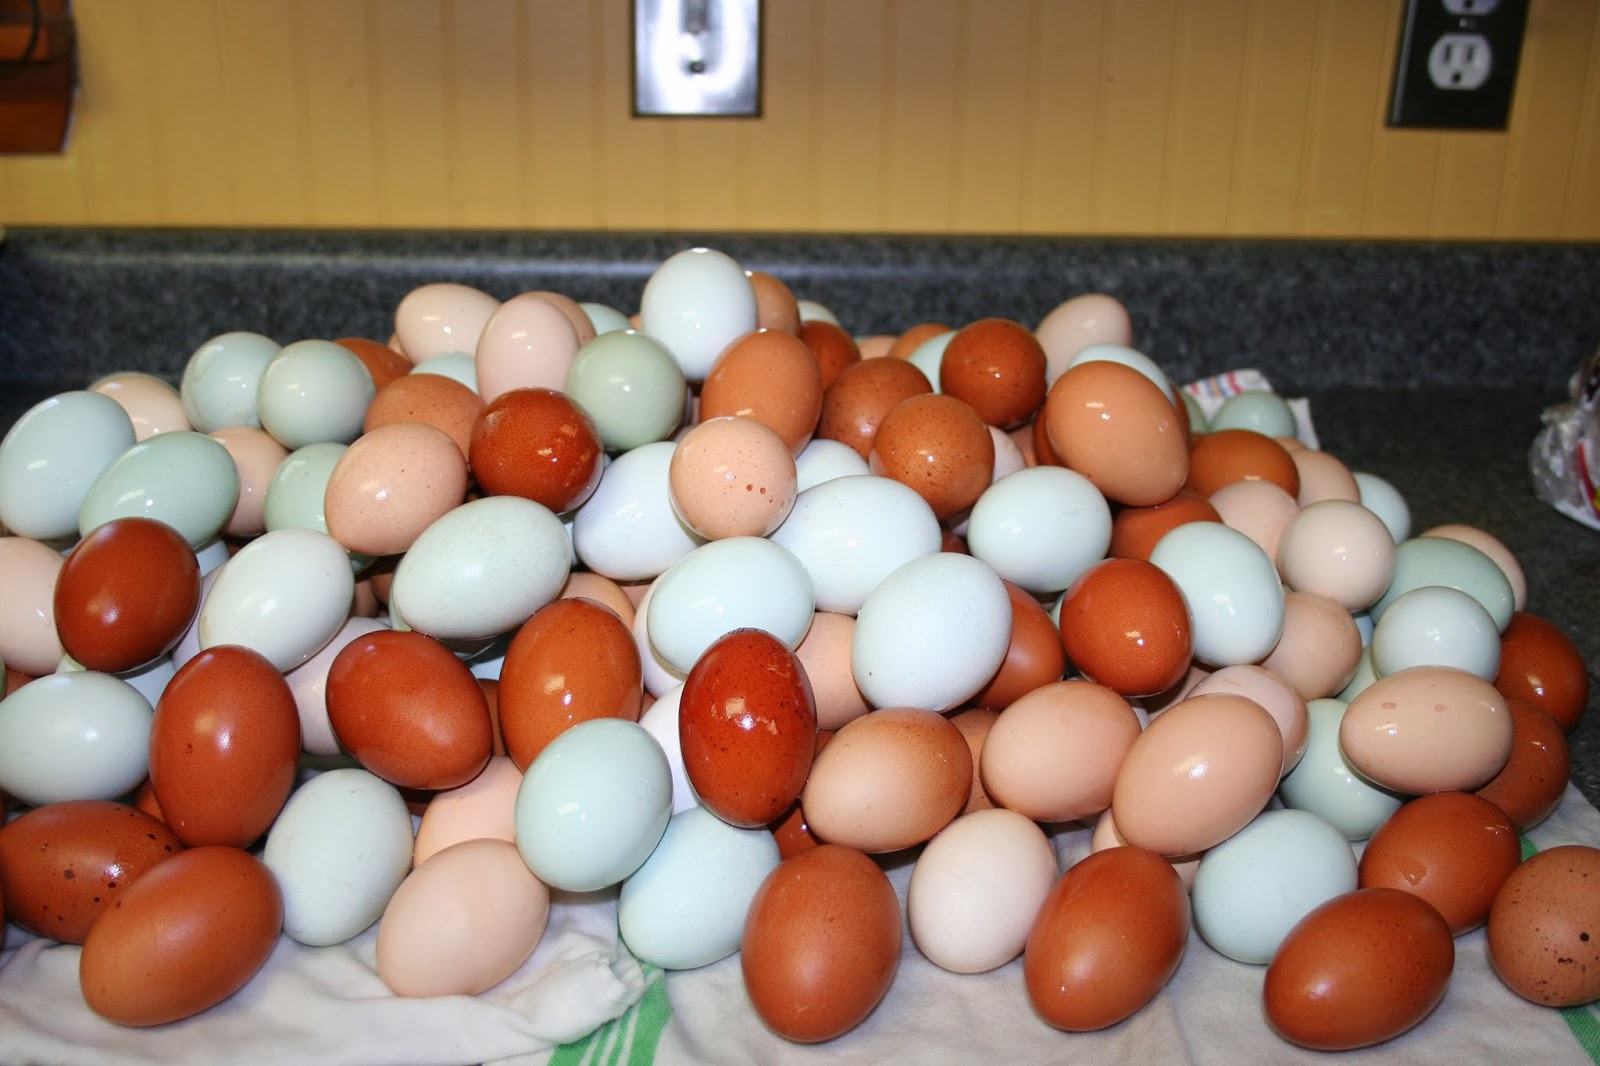
and they were treated very well. Thelma also happened to have around 300 chickens. Only a few of the chickens had names but she loved all of them. They had built them a large building and made it into a really nice chicken coop. They had large fenced area for the chickens but Elmer was constantly leaving the gate open so many of them were free range chickens during the day. She was selling eggs and had herself an “egg route”. She would deliver eggs locally and even had one day a week where she ventured into the suburbs of a large nearby city to deliver eggs. I have no idea if it was legal, but Thelma did it. Elmer and Thelma were very frugal and lived very simply. One day my boss came in and said he saw Thelma in a used but newer Cadillac car. When he asked her about it, she said she had been saving her egg money and bought herself car. She said “When you take care of your money, it's amazing to see how it stacks up.” I should have listened to Thelma's advice.

I never had to doctor any of the chickens, other than occasionally dispensing wormer to them. It was a good thing the chickens were healthy because we were taught very little about chickens in vet school. They were considered a minor species (along with goats and sheep) and very little time was spent on them. Once when I was on call, Thelma phoned very early in the morning to tell me they had a cow that was having trouble delivering a calf. I arrived and found a big calf trying to come backwards and with only one rear leg present. I didn't feel it moving and told them it most likely would be born dead. I had to struggle to reach the other leg and get in a position to pull the calf. I had to use a device called a calf jack to help deliver it. When it was out, to my surprise, I saw it's heart beating. It was alive! After a good deal of rubbing and sticking a piece of straw in it's nose to make it sneeze, it came around. We stood back and let his momma clean him up and Thelma said softly “It's another miracle.” I said “Yes, I didn't think we could get it out alive.” Then she explained to me that it wasn't a miracle that we got it out alive....she had always had faith that I could deliver it. She meant that life itself was a miracle. She said just because it happened everyday didn't mean it wasn't a miracle. Once again, I learned a lesson, taught by an old woman on a chilly morning on small farm that I didn't learn in school.....don't take miracles for granted.

Thelma and Elmer both have passed away and their little farm was sold. I drive by sometimes and see a few cows in the pasture. I hope those cows have names....it would make Thelma happy.

Have a Great Day
Dr. Emily Smith

Friday, October 25, 2013

Special Delivery

Every year here on the farm we meet some really great folks when they come to pick up pullets, chicks or hatching eggs.  This past summer we had an opportunity to deliver some poultry while traveling to the St. Louis airport in MO.  Not saying we deliver poultry but this day it happened to work out for all of us involved and pretty fun.
 
I loaded the truck with chickens, worked out some meeting destinations and off we went. 
 
 
First stop, Lattawatta Creek restaurant parking lot as we handed off the box of peeping chicks to the happy customer.   He had planned on coming to the farm to pickup his chicks]\\\\\\\\\\\\\\\ but since we were heading his way we decided to meet.
 
 
As we headed to our next destination, we crossed the very swollen Mississippi river and the St. Louis Arch. 

 
  It's still amazing no matter how many times I've seen it.
 
 
 Next stop Lambert airport in St. Louis.  We decided to meet in the cell phone parking lot while also waiting on my in-laws that we are picking up.
 
 
As I'm passing off two boxes of young pullets to this happy customer, I turn around to find parked right behind me a police officer.  He says, I need to ask you what your doing.  I said, sir this is going to sound strange but I'm selling chickens here at the airport.  I felt the blood run from my face and I just knew how stupid that sounded.  I asked if he'd like to look in the box.  He seemed to believe me and said no he didn't want to see in the box.  I guess I looked like a chicken farmer and not a drug dealer.
It's never a dull moment and it brings a smile to my face when I think about it.  I just wish I would have asked to snap his picture, I was to busy trying not to look like a drug dealer.
 
I want to thank these great customers for allowing me to take their picture.  Hope your birds are doing well and it was nice to meet you.
 Have a great weekend.
Angie
 

Tuesday, October 22, 2013

Let's Make Our Own Makeup!

Hey there everyone this is Melissa and today we are going to take a departure from our usual chicken and farm topics.  A few months ago I saw a recipe for making homemade tinted face powder.  Like usual I looked at the recipe thought how neat and never wrote it down or saved it.  Bummer.  Then fast forward a couple of weeks and on a Sunday morning I dropped my compact on the floor and busted my remaining powder everywhere.  Now I try not to be a terribly high maintenance kind of gal… but I have to admit that I go NO WHERE without makeup.  I admire women who can, but I just do not.   My brain immediately went into fix it mode and I remembered the recipe I had seen.  I quickly tried to find it with no success.  The only two ingredients I could remember were cornstarch and cocoa powder.  (The recipe may have only had the two ingredients.)  I grabbed my cornstarch and cocoa and set to work making some tinted powder.  While I was making it I thought to myself “This will probably get me through today but really who wears cornstarch and cocoa powder on their face?” Much to my surprise when I applied the powder to my face I could tell no difference between it and my normal powder, other than the slight smell of cocoa that followed me for a while.  When I returned home from church my makeup still looked like normal.  So the next day after I applied my normal liquid foundation I gave it another try and I was once again very pleased with the results.  I have been using the makeup now for a good month with no ill effects to my skin.  As all of you know makeup is expensive, the powder I used to use was about $10.00 and I went through one compact in about a month.  This little recipe cost next to nothing and I use the same amount as I did before.  I love to save a little money here and there on things that I can make myself, and this just seemed to good not to share! 


Here is the recipe:

About 3 TBS Cornstartch
Cocoa Powder (Make sure you use baking cocoa, not chocolate milk mix.  Big difference in the two!)


Since everyone’s complexion is different the amount of Cocoa you should add will vary from person to person.  I am very fair so I did not have to use more than 1 tsp of Cocoa.  Basically I put my cornstarch in bowl added a little cocoa stirred it until it all combined.  Then I put a little on my skin to see how it blended in, then added a little more cocoa and repeated the process until I had the shade I needed.   I put the finished product in my old compact and it works like a charm.


Here is the finished product.  


I hope all of you ladies out there will give this a try, then leave me a comment and let us know what you think!

Have a great week!
Melissa 

Friday, October 18, 2013

Plaster Paint Class - Giving Our Junk New Life

 
This past week I took a Plaster Painting class, with my sister and Niece Melissa (the gal who helps write the blog).  The class was to teach us how to give old furniture a new look. We took the class at a neat little shop,"Nest" in Mt Vernon IL.  If you locals have never stopped in at "Nest" you need to make a point to do so.  This cute shop has something for anyone who has a Nest to fluff.  I found plenty of things while looking through the shop that I could feather my nest with.
Renee, Our Plaster Paint instructor, got us started by showing us all the beautiful colors of paint to choose from and some instruction on layering the paint.  She showed us many examples and effects we could obtain.  The first and most difficult part of the class was picking out the color of paint we wanted to use, with so many colors and possibilities it was a little over whelming.  With the plaster paint you can pick a base coat and then a totally different color for your top coat and when you distress the top coat your base coat shines through, wow so many choices.  
 
The Plaster Paint Company has so many pretty colors to choose from.


Before we choose the color of paint we want, we took a quick look around the shop at some of the different furniture pieces Renee had painted just to give us an idea of the possibilities. 
 
 
You can give your furniture the shabby look.  Or if you like the cottage look that is also possible.  I always lean more towards shabby.


I spotted this cute old bushel basket that Renee had applied a dry brush effect with Ocean Breeze Blue.

 
Once we had our paint colors picked out we headed off to begin the process of creating our master piece.  My project is to give an old picture frame a new look.  My sister Monica is going to give a 1970's chair a face lift.  Melissa is giving new life to an old sewing rocker. 


Renee, our painting instructor, stirs the paint and gets us started.  Let the fun begin!
 You can check out Renee's Facebook page at Renee's Vintage Obsession, you can see some of the furniture she's painted and give her a like while your there, tell her Chicken Scratch Poultry sent you. 


I chose black Plaster Paint for my frame, I also decided to use the original gold paint as my base color to shine through when I distress my top coat.
 
Melissa and Monica are hard at work.  Monica chose black paint for her 1970's chair and Melissa chose Cottage Blue for her sewing rocker.


Once we're finished painting we allow the paint to dry, which means we get to shop around the store a little more, you can't possibly see it all the first time around.   Next step in the process, once the paint has dried is to distress the paint.  Distressing the paint consists of using a wet doubled sided scotch brite sponge, rub off the amount of paint you want so that the under layer shines through.  Once you've scuffed it a bit then turn the sponge over and wipe off the paint you scratched away.  You can scuff as little or as much as you want.  If you don't like the distressed look skip this step altogether.


Final step is to apply the paste wax.


Paste Wax seals and protects your paint from wear, bumps and scratches.  We used a product called rumple cloth to apply the paste wax.  You put about 1tsp of paste in the cloth and lightly apply to your painted surface.  Renee says a little goes a long way.  Apply small amounts of wax and then polish with a clean piece of rumple cloth or soft cotton cloth.  It's as easy as that and your finished.  
 
(Before)
This is my frame before I Plaster painted.  It was solid gold, chipped and pretty rough looking.  I love the painting and wanted to give it a fresh look. 
 
(After) 
I've not seen Monica and Melissa's finished product yet.  Melissa still needs to put a bottom in her rocker and Monica is having some upholstery work done on the chair.  After the class was finished we each got to pick out a color of paint to take home for another project. 
We had a great girls night out getting plastered!
 
Have a great weekend!
Angie

Monday, October 14, 2013

Egg Questions - To Wash Or Not To Wash

I posted a picture on Friday of a pile of freshly washed eggs on my Face Book page and after posting it the questions started flooding in as to why I washed them.
 

I've read all about how eggs stay fresher if unwashed.   Eggs have a natural antibiotic or bloom applied to the outside while being laid which keeps Bactria from entering the egg and causing it to spoil.  When washing an egg you can feel the bloom being washed off, as soon as the egg gets wet, the bloom has a slick feel to it.


When we are holding back hatching eggs to fill the incubators we keep them in a air conditioned room, in labeled cartons, unwashed for 1 week.  Every Monday night we put the cleanest, biggest,  darkest colored eggs in a tray and into the incubator.  If eggs are to small, to dirty, rough textured, or misshaped they don't make the cut.  Those eggs are held out and if useable, they are for consumption.   We do wash a few hatching eggs from time to time if we really need them for chicks and have found it doesn't hurt them at all.  One thing is for sure, a dirty egg will not hatch.


Hatching eggs are gathered in these two baskets and each breed is labeled on the carton so there are no mix-ups when we are selling and shipping hatching eggs through the mail or filling the incubator trays. 
An Olive egger chick can hatch out looking just like an Ameraucana or a Black Copper Marans and always need to be kept separate here on the farm.  Gathering eggs takes about 30 to 45 minutes each evening.
We are now finished putting eggs in the incubator until spring and won't be selling hatching eggs until November, so I'm just gathering the eggs into a basket all together, I love to see all the colors like this.  It makes egg gathering a little more interesting.
Now to get to the question of why did I wash all of those eggs....  I'm finally to the point in this egg season where I can share a few eggs with my family and friends and I want to send them the cleanest prettiest eggs possible.  The family and friends I share my eggs with, most have never raised chickens and are of the understanding eggs should be clean and refrigerated so I do this for there benefit.  They use up the eggs very quickly so there really isn't a question as to how long they will stay fresh once they are washed.  Now as for myself, I wash the eggs when I'm ready to use them, they are also kept unrefrigerated and I've found they are just fine for up to two weeks. 
So should eggs be washed?  Well I'm no eggspert but I say no, unless your giving them away or selling them at a farmers market.  Wash when ready to use.
Have an eggcellent day!
Angie

Friday, October 11, 2013

Moving Back to the Farm


In the last couple of months our family has experienced many changes.  If you have read my previous post you may have picked up on the fact that my husband has been a full time pastor for the last almost four years.  Before that he farmed full-time with his dad on their family’s grain farm.  When Noah asked me to marry him I knew that I would be a pastor and farmers wife, I welcomed that with all of the challenges and blessings it would bring. We had been married about 4 years when we knew we were supposed to leave the farm and go into full-time ministry
.

Visiting with Daddy.

In the last several months it became apparent that God was calling and drawing us once again, but this time to leave the church that we were serving in.  To be honest I wrestled and struggled with what God was asking us to do.  I love the church we served, and did not understand the timing in all of this.  After much talking, tears, and prayer I realized that this step was God’s will for us.  We decided that Noah should go back to farming with his Dad.  This will allow him to preach as he feels lead, and we can minister in some new ways.  I hope that once harvest slows that we can open our home to the people in our area, getting to know those around us. 

The "big" farm girls.
 
There have been so very many tears shed over the fact that we have moved an hour away from our very best friends in the world.  Praise the Lord for facebook, phones, and the fact that we can afford gas to keep the roads hot going to see them!  With the tears came the excitement of moving back to the farm.  We were able to move back into our first home.  It was my husband’s grandparents’ home.  Before we were married we spent many hours working on this house to get it livable, Ella was born while we lived here, and we enjoyed so many great memories here.  Since our family has grown by two little girls, 5 chickens, and a whole lot of stuff it is a little tighter than the last time we lived here.

Our littlest farmer.


It has been fun to see the girls explore and take in all that farm life has to offer.  They love going to visit Daddy while he is working in the field.  Ella says, “The semi is the coolest truck ever!”  The chickens are enjoying their new home as well.  Bugs are plentiful when your house is surrounded by soy beans, so they are loving life on the farm.   It is neat to get up in the morning and look out over a bean field that is owned by my husband’s family and to look out at the old barn and realize that his grandpa built it.  There is a long legacy of farming and ministry here and we are considering it a blessing to get to take part in both.


Little on the hunt for some bugs.
 
God has been good to us!  Even when I don’t understand His timing and question Him all the way, he still blesses my reluctant obedience. 
Have a Blessed Weekend!
Melissa Schlag
 

Monday, October 7, 2013

Getting The Breeders Winter Ready


Do you have your flock ready for winter?  Well it's time to get ready.  It's important to have your birds as healthy as possible for the long winter months.  Winter is a time when mites can become the worst and cause your birds much misery not to mention even death.  During the long winter months most areas are wet and the birds aren't able to do the kind of dusting needed to keep mites away.  Worming is also important to stay on top of.  Just because your birds look healthy doesn't mean they don't have worms.  Birds as young as 6 to 8 weeks old,  believe it or not will have them and if not treated can effect fertility and egg production.

Last year Larry and I decided to try a more natural way of worming, we had heard so many folks rave about how great the all natural way works.  What a bunch of bologna!  If you have good luck with that, more power to you, I'll just tell you, we had the most unhealthy flock of birds we had ever seen on the farm.  If you think that's working, it's a good idea to make sure, take a sample of poo in to your vet and see what they find.   Round worms can become resistant to wormers, so you need to switch what your using often. We also tried using Diatomaceous Earth for mites, your suppose to be able to add it to the feed to kill worms and mites, you can use it also as a dusting powder for mites.  We did both all winter long, it was so much work and seen absolutely no good results, the worms and mites where out of control.  Like I said, if your using this with great results, I think that's great, just saying on the large scale on our farm it was a huge mistake, we won't do that again.  We'll be ready this year.

There are several different kinds of worms that can plague your flock.  Hair worms, Roundworms,
Tapeworm, Gapeworm, and Caecal worms, they can all thrive in a wet poultry run, so winter is the perfect time for them to become a problem in your birds .  You should worm every 6 months, after the first worming, repeat in 2 weeks.  The worm cycle is never ending, your hens can re infest themselves just by eating night crawlers, snails or slugs in the chicken run. The most common symptoms are weight loss or poor weight gain, increased feed consumption, pale yolk color, diarrhea and in severe cases, anemia (pale comb and wattles) and death.  Worms untreated can allow disease to easily creep into your flock and before you know it you've really got trouble.  I can't stress enough how important it is to deworm.

 
 Another thing we do to get ready for winter is trimming rooster spurs.  This picture is an example of how large and sharp a spur can get.  This is not even the sharpest ones we have right now.  Our breeders don't need these for protection, so there is no need to allow them to grow.   If  spurs aren't kept in check they can become a real problem for our breeders.  If you have a breeding flock and you notice a drop in fertility in your hens the first thing you need to check are your rooster spurs.  Hens are smart, they know what hurts and they will begin to hide from the rooster.  A spur this size (this not even a big one) can poke into the side of your hen as deep as the spur is long.  We've seen this happen, and it will kill the hen.  The puncture whole will be hidden by the hens feathering and you won't even notice anything is wrong until it's to late.   When we first began breeding poultry this was a problem we knew nothing about.  After the death of a couple great breeders due to our ignorance, we don't make this mistake any longer.  When I hear folks talk about it being cruel to trim a roosters spur I cringe, what is cruel is not to trim.  
 
 
Spur trimming doesn't have to be a painful bloody process.  It's doesn't take a lot of trimming to make a difference for your hens, and believe me the girls will thank you.  Just taking the tip off is good but they grow fast, also as the rooster walks he rubs them together and with each rub he sharpens them back into a point.  So it's important to check them often.  We use a grinder to take the tip off, it works great, no blood or pain.   As long as you don't cut into the quick, it's no different than trimming your dogs toe nails.
 
 
 Get that flock of yours winter ready, if they have worms sucking up all their nutrients they can't stay warm or healthy during those long winter nights.  If they don't have a good dry dusting spot they can't keep ahead of the relentless biting of mites.  One sign of mites is dirty feathers around the vent area but just because they are clean doesn't mean they are free from mites.  Grab those birds up and check them out.
Happy worming!
Your chickens will thank you!
Angie

Friday, October 4, 2013

Farm Clean Up - The farm is always a work in progress

When we purchased the farm about 19 years ago it still had a lot of old dilapidated out buildings, corn crib and just stuff that accumulates on a farm over the years.  We tore down some of the buildings right after we moved in but some where still left standing until this past weekend when the back hoe operator showed up and began the farm clean up.  Thought I would share some before and after pictures of the process.


Inside view of the old corn crib
 
 
Didn't take much to knock the rusty old corn crib down
 
 
Old tin shed that has seen better days.
 
 
Digging a whole... 
 
 
He pulled some of the trees out from around the pond, it needs more pulled out but we hate to disturb it to much.  If we muddy the water I'm afraid it would kill the fish.  Looks much better though.
 
 
This is an after shot once the corn crib and shed are pushed down.  I think it looks great!  Although we still have more work to do.
Have a Blessed Weekend!
Angie