Friday, December 19, 2014

Homemade Bulk Pancake Mix - Guest blogger Andrea McEwen

Hello again, from North Pole, AK, where we are having a relatively warm and easy winter. We haven’t even seen -20 yet!  We only have about a foot of snow so far, and the northern lights have been very active this winter.  God is good all the time, even when it is -50, but it sure is easier to milk goats and keep chickens happy at these balmy temperatures!
The last time I posted, I shared my recipe for instant oatmeal.  Sticking with the breakfast theme, I am going to share my pancake recipe today.  I’ll give you a small recipe that you can try out, and then at the end I will give you my bulk equivalent recipe if you decide, like me, that this needs to be a regular staple in your kitchen!  Here is what you will need:

1 C flour
1 T baking powder
½ t salt
1 egg
1 C milk
3 T oil
*If you add another egg and a little oil, this works for waffles also.

Place your milk, egg, and oil in a mixing bowl and whisk together lightly.  Add the flour in 1 cup at a time, whisking slightly between cups.  

Then add the baking powder and salt and mix well.  Let the batter sit for 5-10 minutes, it will get bubbly and rise slightly.  If your batter seems a little thick, add a little milk.  I like mine thinner, but some people like theirs thick to soak up the syrup! 


 Heat your griddle to 350* or your skillet on your stovetop.  I like to butter my griddle before beginning for buttery pancakes, but it isn’t necessary.  Pour your batter onto the griddle in small circles, 3-4” diameter.   

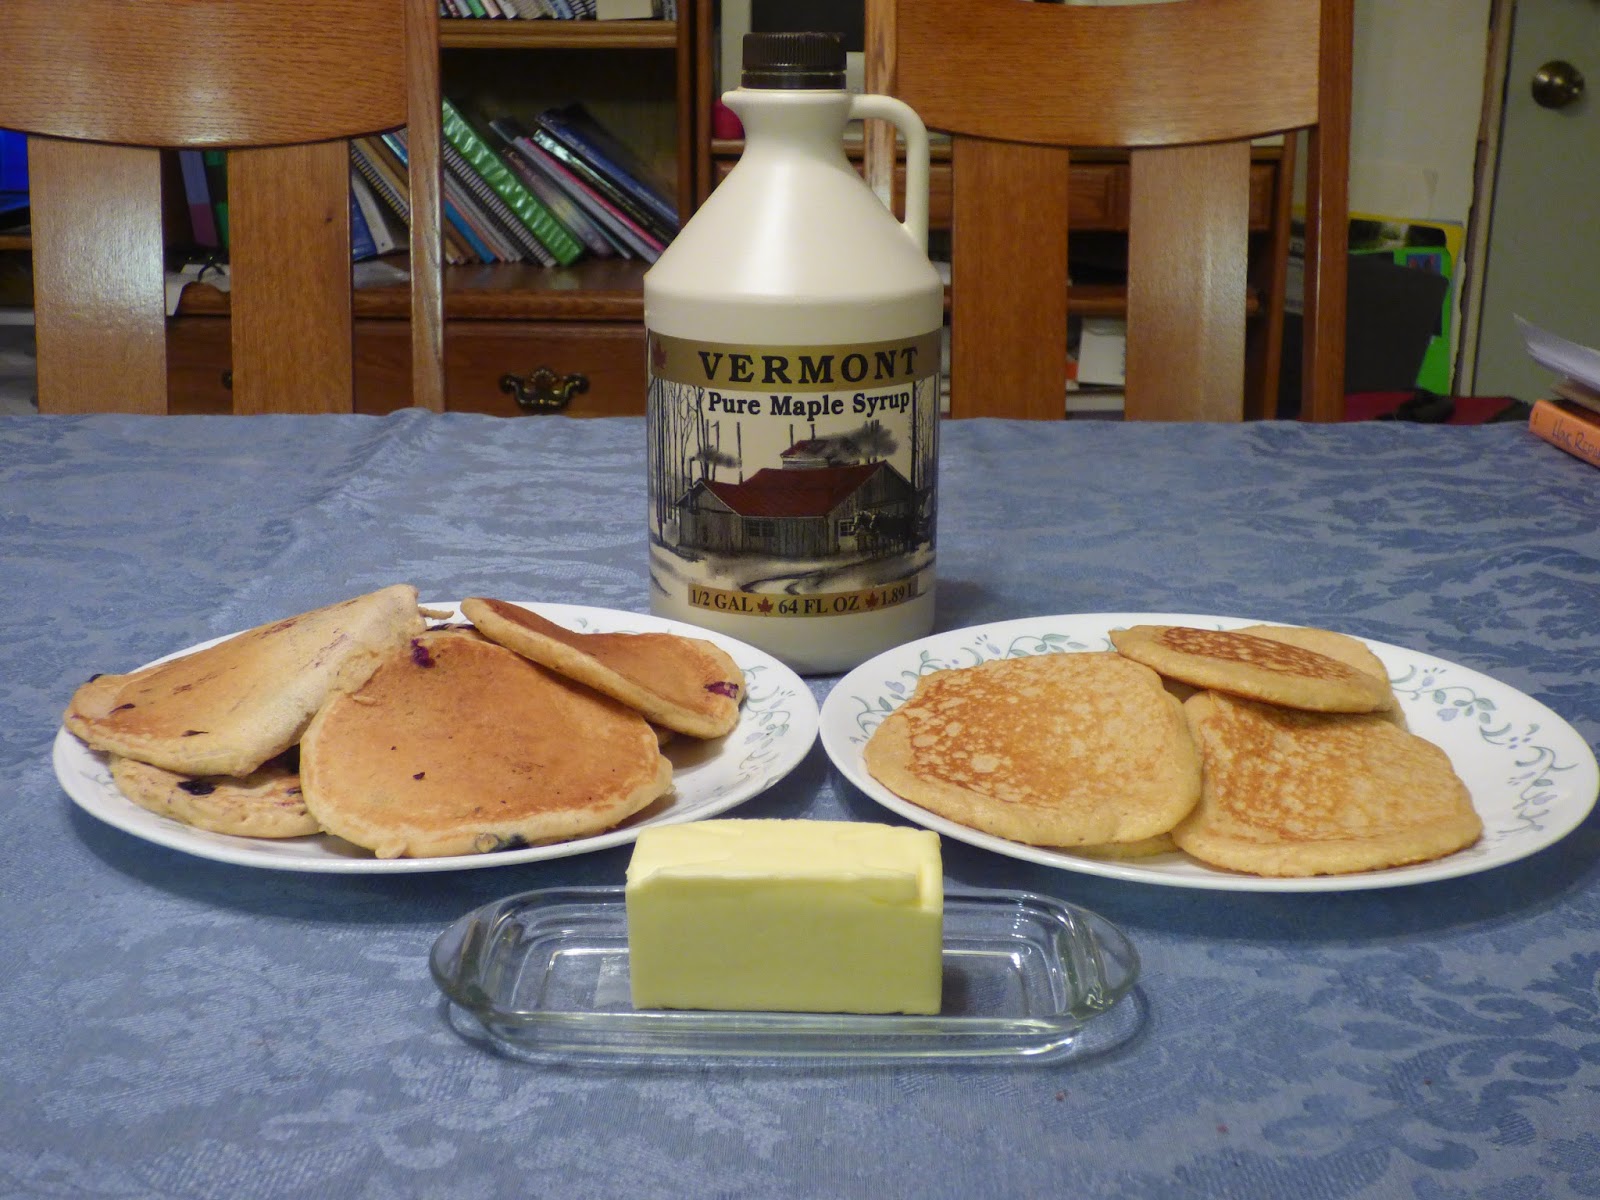
When they start to bubble on top or dry around the edges, flip them over carefully.  When the middle seems like it should be done, put those ones on a plate and do it again!  Homemade pancakes are delicious, and really simple to make!  For my family of 5, a 2 cup batch will mix up enough pancakes if I am serving some eggs or meat with them.  If it is strictly pancakes, then I make a 3 cup batch.  Serve them with butter and maple syrup, and I guarantee they will lick their plates when you aren’t looking!

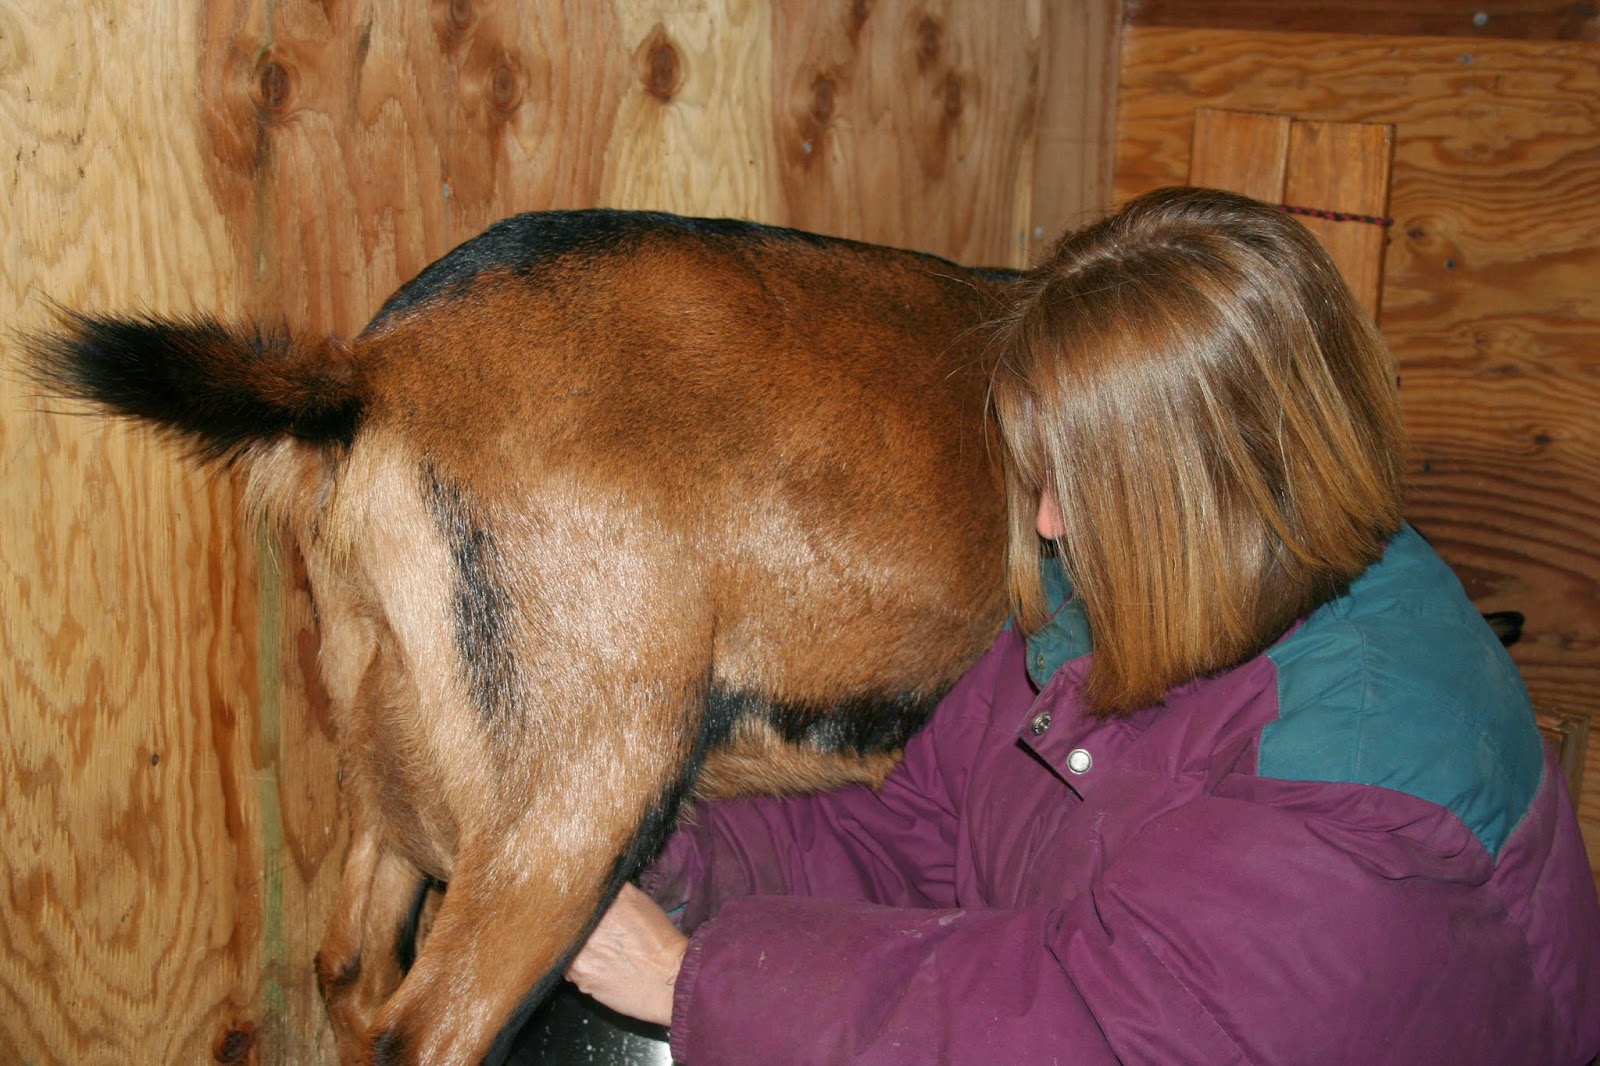
By the way, I love to use fresh ground soft white wheat flour in my recipe, but any flour will do.  However, fresh ground flour loses nutrition quickly, so when I make up large batches of this mix I stick it in my freezer (also known as the great outdoors this time of year!)  I also use fresh goat’s milk and eggs from my Chicken Scratch Poultry layers.


All right, I also promised you a bulk recipe, so here it is:
24 C flour
1 ½ C baking powder
4 T salt

Mix it up thoroughly, and put it in an airtight container for future enjoyment.  For every cup of mix, add in 1 C milk, 1 egg, and 3 T oil.  Sometimes, if I am taking this mix camping or fishing, I will add in some powdered milk to make it even easier.  I would add about 3 C of milk powder to the full batch, then all you need is water and eggs for your pancakes!
Well, I hope your family enjoys this recipe as much as mine does!  I would love to hear from you when you try it out!   - Andrea

Wednesday, December 10, 2014

Homemade Ricotta Goat Cheese


I shared with you last week about how I learned to milk a goat while visiting our family in North Pole Alaska.  It was such a neat experience, goats are such sweet animals and from what I could tell just by being with them a few days, goats seem to be fairly easy to care for and don't require a large amount of room to keep them.  That being said I don't have goats myself, so I could be totally wrong. One thing I do know is that if you plan on getting goats for milking, this is not a job you can take a break from, you milk twice a day on a goats schedule not your own schedule.
After we had milked the goats I was interested in tasting the milk for the first time and Andrea, my sister in law also suggested we make a quick and easy Ricotta cheese.  Larry and I poured a small glass and swirled and sniffed it as if we were wine tasting and then took our first sips of goat milk.  It was surprisingly very good.  Larry and I had both been disappointed in the past at tasting goat cheese for the first time, so we were a bit gun shy at tasting the milk.

Ricotta Cheese
This recipe can be halved or doubled and can also be made using whole cows milk form the store if you don't have a goat.

Heat 1 gallon milk to 206 degrees

Add 1/4 cup white vinegar, stir in 1 Tablespoon at a time until the whey is a clear green.


Stirring gently, the curds will begin to form.


Notice how the whey has turned a light green.  This process only takes a few minuets.


Gently ladle the curds into a cheesecloth lined colander and drain for 1 minute.


Place the curds in a bowl and mix in 3 tablespoons of butter and 1/2 teaspoon of baking soda.  Refrigerate and enjoy.  I must say it was delicious! 
Now your ready to make a delicious lasagna or baked spaghetti.
Leave us a comment, we would love to hear of your experience with goats, let us know if you find them easy to work with and care for.  Do you find them useful?  How many products can you produce with a goat?  Come on goat lovers share with us.
     Have a Blessed day!
Angie

Wednesday, December 3, 2014

Milking A Goat


During our visit in North Pole Alaska a couple of weeks ago I had the pleasure of milking a goat for the first time ever.  I was a little nervous at first but the goats are so sweet and didn't seem to mind a stranger at the milk stand.  My hands where pretty cold at first and I apologized to her, she seemed to say, "that's ok I'm use to it."  I found that milking was a little harder than I imagined it would be.  I guess with practice I would get better, I never really got much of a rhythm down.

Before we began milking, Andrea cleaned the teats very well, gave the goat a scoop of food, and gave me instruction to watch so that the goat did not step in the milk pail.  I think that's what made me a bit nervous, I didn't want to be the newbie that allowed the goat to ruin the milk. 


I was a very slow milker, I guess practice makes perfect.  By the time I had finished trying, the goat was out of food and looking over her shoulder like what's taking so long back there.
 When Andrea took over, she had the rhythm down very well and two goats milked within just a couple of minutes.
The following day our nephew Brody thought he would teach Larry how to milk.  Within the first couple of minutes the goat had stepped in the milk pail and Larry was fired.  I guess he'll stick to chicken farming.
Check back with us real soon and we'll make Ricotta cheese with the goat milk.
A big thank you to our family in Alaska for a great time and new experiences.
Have a great day.
Angie

Friday, November 21, 2014

North To Alaska

North To Alaska


We just returned from a great visit with our family in North Pole Alaska and thought I would take this time to share some of the things we did, each day was a new adventure.   The Temperatures stayed around 20 degrees during the day, which wasn't bad at all and they have about 2 to 3 inches of snow on the ground.


The sun begins to peek up over the horizon at about 9:30 in the morning but this happens a little later with each passing day as winter sets in and the days begin to shorten.  It gets dark in the evening around 5:00.  The sun never makes it up over the tree tops during the day before it is heading back down.


Larry and I headed out on an adventure to the Chena Hot Springs.  It was a beautiful drive and we made many stops along the way just to look around.  This is the Chena river, it only has a thin layer of ice at this time but very soon it will be think enough to drive on.

We took a short hike down this winding path in the woods.  Since we didn't know where we were going and not dressed for cold weather we didn't go far.


Lots of beaver sign in the area.


It was about a one hour drive out to the Chena Hot Springs from North Pole.  It was worth the drive.  As we approached you can see the steam hanging in the air and all the trees are flocked in white.
It seemed very strange to be putting on bathing suites and heading outside into the snow to swim.  The water was extremely warm and just down right hot in some areas of the pool.  At one point we needed to get out of the water to cool off, by the time you feel your swimming suit begin to freeze it's time to get back in.  It was absolutely beautiful, we were surrounded by snow covered hills and mountains as we wade around in the steaming hot water.
We had a great time in Alaska, tune in next week and I'll share learning to milk a goat while in Alaska.
Have a Great Weekend!
Angie

Thursday, November 13, 2014

Strawberry Oatmeal Mix - Guest Blogger Andrea McEwen

This week we're blogging to you from Alaska.  We're here visiting with family and having a great time.  One morning this week while standing in my sister in laws kitchen watching her mix up what seemed like enough oatmeal to feed an army, I asked her what are you doing?  She replied, oh just making some strawberry oatmeal mix.  So I grabbed the camera and thought it would be great to share with you all.  With 3 kids still at home, she has some great money and time saving tips that I hope she will begin to share with us from time to time. Now I'll turn the blogging over to Andrea and she will share her strawberry oatmeal mix with you all.

Hi!  I don't know about all of you, but a common question at my house is, "What's for breakfast?"  Or lunch, or dinner, or snack, or .... You get the idea.  I am always on the lookout for recipes that are healthier than store bought alternatives, inexpensive, and most important-something that my kids will like!  I can't get them to like oatmeal for the life of me if I cook it from scratch, no matter what toppings I offer with it, but they will eat packaged oatmeal by the box.  One package is not enough for my hungry teens though, and I wanted something with ingredients I could pronounce.  So, I have come up with this recipe, and I will give you some hints for ways to sneak in some healthy ingredients as well.

The basic recipe looks like this:
9 C quick oats
1 1/2 C sugar
1 1/2 C powdered milk
1 1/2 teas. salt
3 C freeze dried fruit
1/2 C ground chia seeds or flax (opt.)
Mix up your oats, sugar, powdered milk and salt.  Stir in your dried fruit (cut it up if they are large pieces like strawberries) and your optional ground seeds, and you are done!  Pour it into a jar for storage and breakfast is ready!  When it comes time for breakfast, younger kids might want 1/2 cup, while older kids might want up to a cup.  Pour boiling hot water over the top just like you would for instant oatmeal packages, and let it sit for a few minutes.  You can also microwave it for about a minute, depending on your microwave.  You can adjust the thickness to your preference by adding more or less water.  If your kids are old enough to run a microwave or boil water, they can make their own breakfast, and that is a beautiful thing!  I also often tell them to make a small bowl of oatmeal to tide them over until breakfast (or dinner!) is done.  Between this oatmeal and eggs from our Chicken Scratch Poultry hens, breakfast is easy and healthy every day.
One last thought, I am always trying to sneak some flax into various recipes for its great Omega-3 benefits, so I started throwing a little of that into my mix as well.  Then I started hearing about the benefits of chia seeds, so I throw some of them in.  If your family isn't used to that, add a little at a time and they won't notice!  You can also use sugar substitutes, or reduce the sugar in the recipe.  When I adjust a recipe, I slightly reduce the sugar (maybe 2 T less) every time I make a batch until I start getting complaints, and then I bump it up a bit and that's the new recipe.  I buy the Augason Farms freeze dried fruit, but you can use any dried fruit or freeze dried fruit available in your area or on Amazon.  My kids prefer the strawberry, but I have done it with Craisins and dried apricots as well.  I also have a recipe for maple and brown sugar oatmeal mix that I will try to share at a later date if you all are interested.
I would love to hear from you if you think of some new ideas to add to this recipe!  Cooking healthy meals for a family can be a challenge, but when we share our ideas it can make our lives easier.
From North Pole, Alaska, Andrea McEwen

Wednesday, October 29, 2014

Pullet Pen Improvements

When raising up young pullets it's important to have a warm dry place where they can grow and thrive.  Lately our pens have proved not to be as dry as we needed.  With each rain the young birds would stand in mud for days and that is never a good thing.  With our set up it's not possible to have the birds on a nice grassy area.
We have three grow out pens pictured here, each pen has a pullet box for them to get into at night, as the birds grow they are moved from one pen to the other and as you can see they are a muddy mess.  Well this past week we decided it was time to try and remedy the problem.  We had a few tons of gravel delivered and the work began. For starters, some of the fencing and gates needed to be taken down in order to fit the tractor into the area.


Larry found this handy, dandy, scoop for the tractor last fall on Craig's list.  Sure makes the job easier.  Let the scooping begin.


The tractor just fits through the opening, thank goodness!  The camera operator also happens to be the gravel spreader, along with my side kick Heather.


The gravel is spread, the fencing and gates will be put back into place and let's hope this keeps the birds out of the mud.


The batch of young birds to your right have just been moved from the brooder house,  into a pullet box. They will be kept in the box for three days, then allowed out of the box.  Keeping them in the box for at least three days teaches them that this is home.  After three days, each evening they will automatically get into the safety of the box and we shut the doors.
If your interested in pullets we still have some available for sale, the breeds available are, Olive Egger, Ameraucana, Lavender Orpington, Chocolate Orpington, Black Copper Marans, Blue Copper Marans and Splash Marans.  Check out the website for more details, http://chickenscratchpoultry.com/ drop me an email from the website if you have any questions. Hope to hear from you soon.
Have a wonderful day!
Angie

Friday, October 17, 2014

Collecting Honey From The Bee Hive


This is our first year working with bees and I must say, I never realized that bees could be so interesting.  They are very amazing, creative creatures and it is fascinating to watch them work.  Just like with any new hobby the first year is always when you make all the big mistakes and hope that you learn from them.
We began this spring with two packages of bees that we ordered and shortly after we received those we also caught a swarm of bees.  The swarm we caught has by far done better than the packaged bees since it came intact with all it's workers.  One of the packages of bees we purchased did not survive the first 3 months.  The other package of bees has done well but we will probably need to feed them all winter long.  Packaged bees play catch up all summer long, having no stored honey, having to build the entire wax comb and raise up young worker bees, this starts the hive off in a deficit.   If you plan to get started in bees I totally recommend ordering a nucleus hive.  A nucleus hive consists of a 2 to 5 frame hive used to start off a new colony.

Once we we're decked out in full gear we duct taped the bottom of our jeans and any other little
hole that sneaky bees can get into.  Larry figured this out the last time he opened the box and they climbed up his pant legs.  So glad he learned this little trick before I did.
We smoked the bees and began the process of opening up the hive.  We're collecting the honey from the swarm of bees that we caught in the spring.  We won't be getting honey from the packaged bees this year.  They will need all of their honey to make it through the winter.  The swarm hive that we are working on has thousands of bees in the box, it's absolutely amazing and a bit intimidating how many bees are in this box.  Taking the top off of the hive doesn't really upset them but as soon as we remove one frame from the hive they come boiling out of the box.
Since we don't have a honey extractor yet we choose to use a wax foundation on the frames. That way we can just cut the comb out of the frame.  The comb is edible right along with the honey and extractors are very expensive.
As we took each frame from the hive we brushed the bees off with a soft brush, we carried the frames around to the front of the house out of the view of the bees and a considerable distance from the hive and covered them with dish towels. We were taking each frame in the house, one by one, cutting out the comb and bringing the frame back outside while holding a paper plate under the frame to catch all the drips of honey.  In pretty short order the bees figured out where we had taken the honey and within just a few minuets the entire hive had moved to the front of the house and began packing honey back to the hive as fast as they could.  We decide we needed to change our strategy.   So we began quickly brushing them back off of the frames and moved the frames into the house.  What a sticky mess that was.  I left honey covered paper plates outside in the rush to get the honey from the bees. Within just a couple of minutes they had the honey licked off of the plates and headed back to the hive. You couldn't even find a sticky spot on the plates when they were finished.  That was a learning experience.  Like I've said before, we don't know what we're doing but it's fun learning.

I cut a slice of comb and placed it in each jar, I think it looks beautiful and tasty too.  After I cut and saved back the amount of comb I wanted, we put all the rest of the honey and comb into a pot and slowly heated it until it was all melted.  Then we let it cool overnight.  As it cools the comb separates and comes to the top.  When it was all finished and in the jars we had almost two gallons of honey.  Not to bad for our first year.  It's a lot of work and we have a lot to learn that will hopefully make the process run smoother but I must say it's absolutely delicious.
If I decide to sell honey next year I think I'll stick a sign at the driveway that reads,  honey for sale pick your own.
Have a great weekend!
Angie


Proverbs 16:24

Pleasant words are a honeycomb, Sweet to the soul and healing to the bones.

Friday, October 10, 2014

Heirloom Beans


I know in most areas the harvesting season in your garden is over but last week I picked almost a bushel of green beans.  Every year I love to plant my great grandmother Grace Wagner's heirloom green beans.   If your going to plant a garden it might as well have history along with it.  These beans have been passed down through our family for many, many years.  My great grandmother was born in 1895 and died in 1982 at the age of 87.   I'm not sure what kind of beans they are, all I know is that she obtained the seeds from a man named James Blecher and they have always been called Belcher beans.    This is a climbing bean, they can be picked as a fresh green bean or you can leave them a little longer on the vine until the beans fill out in the pod, then they can be shelled out and kept as a dry bean.
 The Blecher bean blooms with very pretty white and yellow blooms.  They are an easy to pick bean since they are climbers, I really like that part.  This bean has an unusual wonderful nutty flavor.  My great grandmother knew this bean was worth keeping around, she passed them down to her children and her son, my grandfather passed them down to me.  It's now my turn to keep them going and pass them on to my kids. Alright kids which one of you will keep the Blecher bean going?


My mother purchased some seeds this spring that I found so interesting.  You may have heard of this bean before, it's also an heirloom bean and it's called Scarlet Runner.  It's one of the oldest runner beans in existence, they date back as far as 1750.


The scarlet runner has the most beautiful red blooms and are great for ornamental purposes. They prefer full sun but will tolerate part shade. You can also allow the beans to fill out the pods and shell out as dry beans.  On the Scarlet runner even the blooms are edible.


The Scarlet runner produces a very nice long green bean.  If you allow the beans to mature and fill out the pods, when you open them to shell them out, what a neat surprise, so pretty and pink.
Do you plant heirloom seeds in your garden, have they been in your family for years?  Tell us about the history in your garden.
Hope you have a great weekend!
Angie

Friday, October 3, 2014

Farm Happenings - Fixing the ditch and ending up in a bind

This past summer we've had several torrential down pours that have been very hard on our old poultry barn.  The barn completely flooded twice, which is a huge mess.  It is hard on the birds, egg production and the farmer who take care of the birds.  Well the farmer decided he was going to fix this problem once and for all.  A small creek that runs along side the barn is needing to be straightened up and dug out deeper.  We once had horses and they walked the sides of the creek down to a point it now wants to flow through our barn.  Seems there is always something needing fixed around here.
Larry has a small Ford tractor with a scoop on the rear and so the work began.  Farmer Larry sometimes thinks he can go anywhere and do anything on his little tractor.  The work was going along pretty good for awhile and he was making great progress and then he pulled the tractor down into a deep part of the ditch and I thought to myself "this is not good."

It's amazing how quickly things can turn ugly.


He looks at me and says "now what?"  He didn't like my response of "well I don't think I would have drove down in there."  Now the real work begins.  My brother in law, Gary brings his 4 wheel drive truck out and gives it a few good pulls, without budging it one bit.
The old Ford is in a bind.  So what do you do when your in a bind?  You call  J & R Towing.  They'll unbind you.

Jason Irvin, the tow truck driver took a look at the tractor and said "wow how'd you do that?"  


In just a couple of minutes Jason had it winched up and out of the ditch.
Thanks for the help Jason!

The old Ford gets a much needed bath and all is well on the chicken farm.  Farmer Larry is not a follower of the blog, so you locals keep your mouth shut that you seen me post this.  I just like to share the farm happenings and let you know it's not all baby chick fluff and pretty eggs all the time. Sometimes we sling a little mud. 
Have a great weekend!
Angie

Friday, September 12, 2014

Farm Happenings - Pullets Available

A few weeks back Larry began work on putting up more fences, making new gates and constructing pullet boxes.  It takes plenty of room to grow out pullets and we needed more space.  The best way to grow up beautiful healthy pullets is give them a lot of room and try not to over crowd.

New gates and pens

We raise the pullets in boxes with wire bottoms raised off the ground about 4 inches.  They have ventilation on the back that is covered with wire so that no predictors can get in.  There is a door on each end and a lid on top that can be open during the day and closed at night.  Works very well.


 Many of our customers don't have the ability to own a rooster so they choose to order pullets.  A pullet is a young hen less than one year of age.  We normally ship our pullets out when they reach the age of  8 weeks old.  They ship best at this age.  If you order chicks from a person and they want to ship you birds that are 1 to 2 weeks of age it is best to decline their offer.  Chicks do not ship well at this age, they aren't able to regulate their own body temperature at this young age nor do they have the body weight to sustain them during shipment.  Shipping at 8 weeks is a good age and size, they are fully feathered at this time.
The farmer really hates it when I sneak around and snap candid pictures. Good thing he doesn't read the blog, Ha.


If you think you might be interested in a pullet, here are a few that we have ready now and some that will be ready soon. 
Olive Egger
I have some Olive hens that are about 5 months old, they are beautiful big girls.  Olives Eggers can be black, blue and sometime splash.   When ordering a hen this large we will only ship 1 or 2 per box depending on the temperatures while shipping.  We also have younger Olives ready to go.  She will lay a dark green egg.
Blue Copper Marans
I have Blue Copper Marans pullets about 10 weeks old ready to go.  Look at that beautiful coppering on her head.  She will lay a pretty dark chocolate colored egg

Splash Marans,
I have a couple of splash marans that are around 4 to 5 months of age, then I also have some around 10 weeks old.  They will also lay the dark chocolate color egg.  We only get a few of these birds each year and they are beautiful.
Chocolate Orpington
I have a few of these cuties ready to go.  The Chocolate Orpington is a bantam but not a tiny bantam.  If your looking for a pet bird this is the one for you.
Lavender Orpington
In a couple of weeks I will have several Lavender Orpington ready to go.  Lavenders are good layers and very friendly.
I will also have Black Copper Marans and Ameraucana hens ready in a few weeks.  
If you see something your interested in, head over to the website and drop me an email.
http://chickenscratchpoultry.com/
Have a Great Weekend.
Angie