Renee, Our Plaster Paint instructor, got us started by showing us all the beautiful colors of paint to choose from and some instruction on layering the paint. She showed us many examples and effects we could obtain. The first and most difficult part of the class was picking out the color of paint we wanted to use, with so many colors and possibilities it was a little over whelming. With the plaster paint you can pick a base coat and then a totally different color for your top coat and when you distress the top coat your base coat shines through, wow so many choices.
The Plaster Paint Company has so many pretty colors to choose from.
Before we choose the color of paint we want, we took a quick look around the shop at some of the different furniture pieces Renee had painted just to give us an idea of the possibilities.
You can give your furniture the shabby look. Or if you like the cottage look that is also possible. I always lean more towards shabby.
I spotted this cute old bushel basket that Renee had applied a dry brush effect with Ocean Breeze Blue.

Renee, our painting instructor, stirs the paint and gets us started. Let the fun begin!
You can check out Renee's Facebook page at Renee's Vintage Obsession, you can see some of the furniture she's painted and give her a like while your there, tell her Chicken Scratch Poultry sent you.
I chose black Plaster Paint for my frame, I also decided to use the original gold paint as my base color to shine through when I distress my top coat.
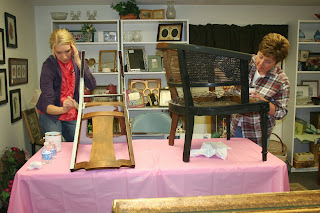
 Melissa and Monica are hard at work. Monica chose black paint for her 1970's chair and Melissa chose Cottage Blue for her sewing rocker.
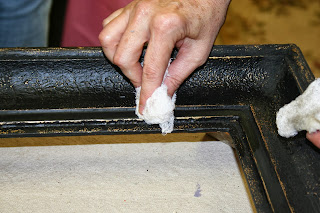
Final step is to apply the paste wax.
Paste Wax seals and protects your paint from wear, bumps and scratches. We used a product called rumple cloth to apply the paste wax. You put about 1tsp of paste in the cloth and lightly apply to your painted surface. Renee says a little goes a long way. Apply small amounts of wax and then polish with a clean piece of rumple cloth or soft cotton cloth. It's as easy as that and your finished.
(Before)
This is my frame before I Plaster painted. It was solid gold, chipped and pretty rough looking. I love the painting and wanted to give it a fresh look.
(After)
I've not seen Monica and Melissa's finished product yet. Melissa still needs to put a bottom in her rocker and Monica is having some upholstery work done on the chair. After the class was finished we each got to pick out a color of paint to take home for another project.
We had a great girls night out getting plastered!
Have a great weekend!
Angie


Wow how pretty!
ReplyDeleteHow fabulous!!! Thank you ladies for a wonderful Blog about Plaster Paint Company. Renee is a fabulous instructor!!!
ReplyDelete